
When you are preparing PowerPoint presentation for a big audience, do not forget to make handouts which are very powerful visual aids. Your listeners will appreciate them a lot. Such created presentation handouts will help everyone to follow you along and track all important information, facts and figures. Converted PPT presentation to handouts in Microsoft Word format allows editing, distributing and printing the information.
You can share and print your PPT presentation directly. However, if you convert your presentation to Word document first, lots of additional options will be available to you. In this tutorial you show how you can cover the whole conversion process. You will also learn how to select available text layouts.
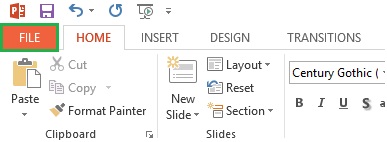
Let's begin with opening up the file with your presentation (please note we are using PowerPoint 2013).
- In the PowerPoint ribbon you should select the tab "File".
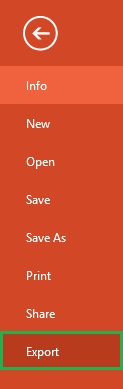
- On the left side you can see a list with all available options and select "Export".
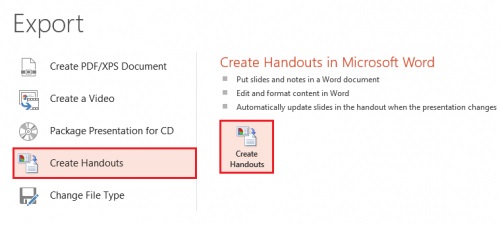
- Now we can start the process of making our handouts. There is one option called "Create Handouts". Select it and chose "Create Handouts" one more time.
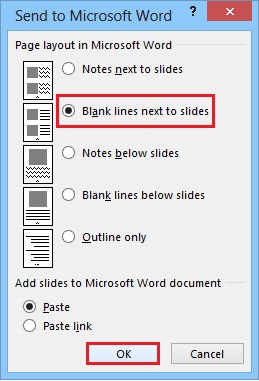
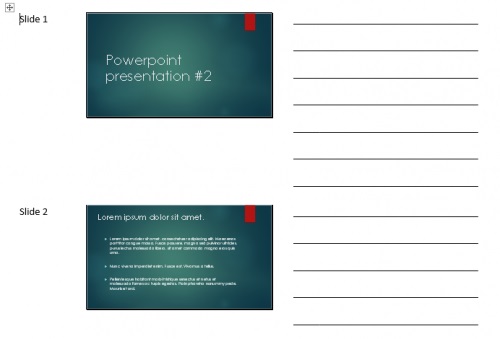
- The window named "Send to Microsoft Word" is presented. You can select the type of desired page payout. In the following tutorial we have selected "Blank lines next to slides". However you can choose any you like. What this layout type will give you? It will crate blank lines to all your ppt slides in Microsoft Word. This is very practical as your audience will be able to use them for writing down their notes while listening to you. So make your choice and click "OK" for launching the process of conversion.
- When the process of conversion is complete, a new Word document with PPT slides will appear.